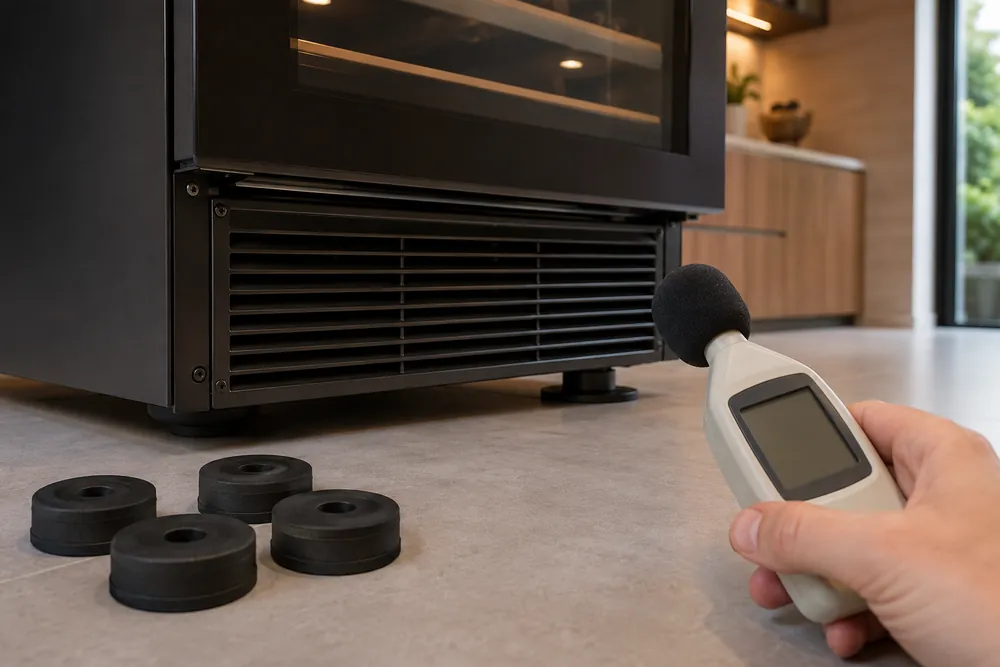
TL;DR: Wine cooler noise usually comes from the compressor, fans, loose bottles, or vibration transferred through an uneven floor or nearby cabinet.
Quieter operation comes from proper clearance, careful leveling, stable shelves, balanced loading, and regular dust removal.
When choosing a unit, compare its cooling design, ventilation requirements, door construction, published noise details, and owner reports about humming or rattling.
Why Wine Coolers Make Noise and Vibration
Compressor movement, fan airflow, bottle contact, and cabinet resonance account for most wine cooler noise.
A normally operating unit may hum or cycle audibly, but installation conditions can transfer that ordinary motion into louder rattling, buzzing, or vibration.
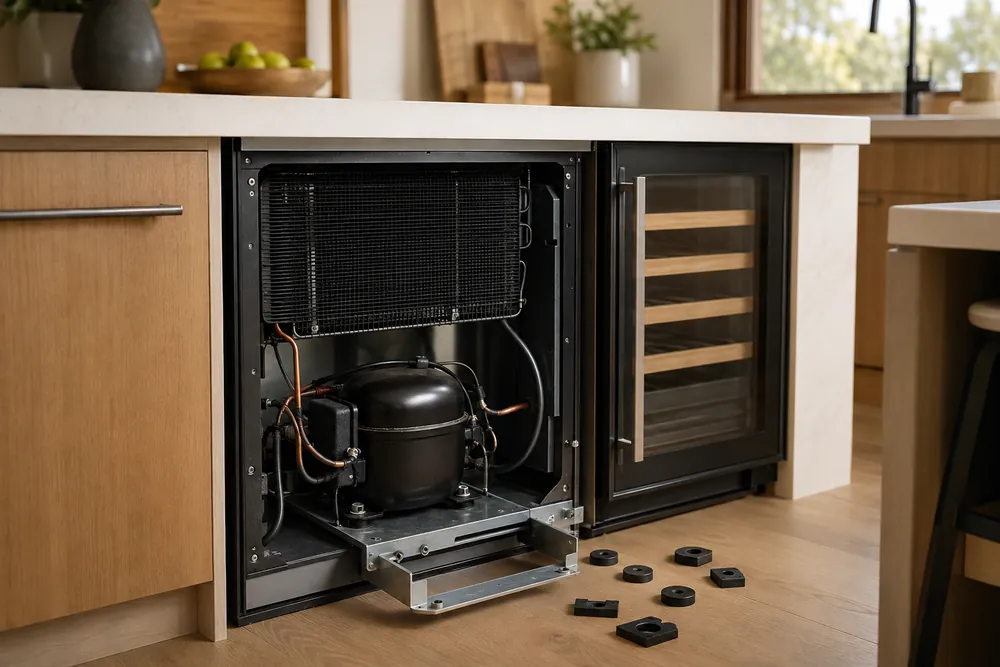
Compressor-based coolers produce a low hum as refrigerant circulates through the sealed system.
Sound often becomes more noticeable during a cooling cycle, especially after the door has been opened or the temperature setting has been lowered.
Thermoelectric models avoid compressor vibration, but they still depend on fans to move heat away from the cabinet. Dust on the fan or vents, restricted airflow, and aging fan bearings can create a whirring, ticking, or uneven sound.
| Specification | Common category range | Noise or vibration consideration |
| Storage temperature | About 40°F to 65°F | Lower settings may increase cooling cycles and operating sound. |
| Compact and undercounter capacity | About 12 to 50 bottles | Larger interiors may require stronger airflow or a larger cooling system. |
| Freestanding clearance | About 1 to 5 inches | Insufficient space can trap heat and keep the fan or compressor running longer. |
| Undercounter opening width | About 15 to 24 inches | The opening must match the appliance and its required ventilation design. |
Cabinet vibration becomes louder when the cooler touches a wall, countertop, neighboring cabinet, or another appliance. Hard surfaces can act as sound paths, turning a mild internal hum into a noticeable resonance across the room.
An uneven floor or poorly adjusted foot can tilt the cabinet and transmit motion through the frame. Leveling also helps prevent bottles from shifting against shelves, racks, or one another when the compressor starts or stops.
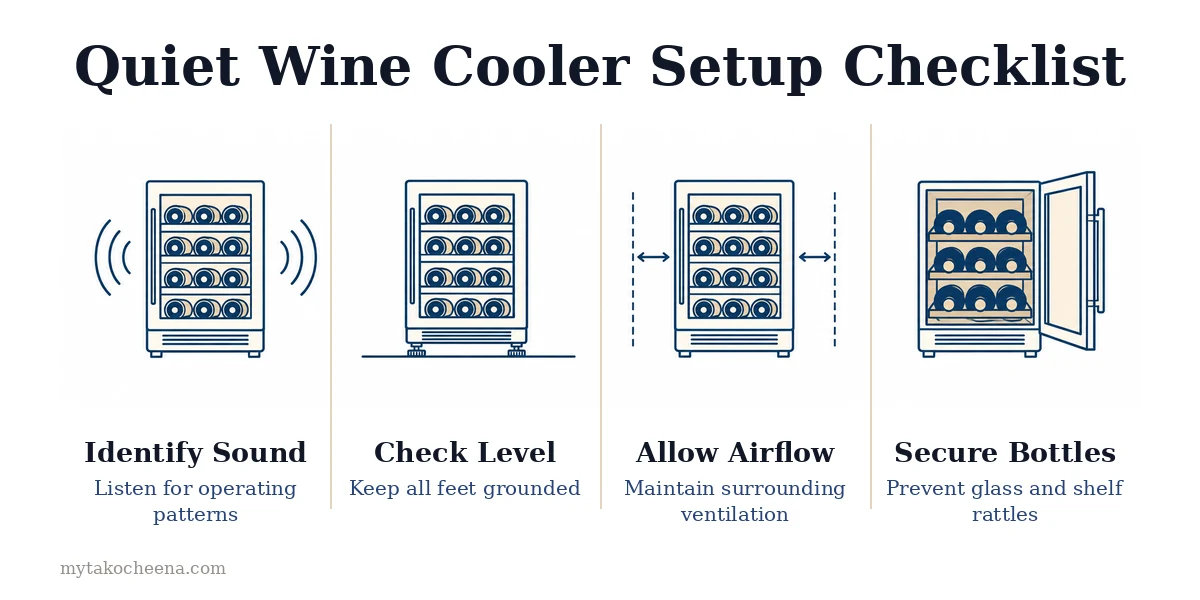
- Loose bottles: Glass can knock against adjacent bottles or shelf rails.
- Restricted vents: Blocked intake or exhaust openings increase airflow noise and operating time.
- Loose components: A panel, rack, screw, or fan guard may rattle as the motor runs.
- Dust buildup: Deposits can reduce airflow and make fans work harder.
Published noise details help distinguish expected operation from a possible setup problem.
Owner reports add useful context, particularly for bedroom, office, or living-room placement, where humming and intermittent cycling are easier to notice.
Before treating noise as a defect, check leveling, clearance, bottle placement, ventilation, and contact with nearby surfaces. These factors often explain vibration that otherwise appears to come from the cooling system.
For a kitchen check, measure the opening at its narrowest points, then compare those dimensions with the cooler’s listed installation requirements.
Account for wall trim, countertops, nearby cabinets, and the space needed for the door to open without striking a handle or adjacent appliance.
Measure depth beyond the cabinet face as well, since a cooler that fits the width may still project into a walkway.
Mark the required ventilation gaps, check that the floor is level, and leave enough room to pull the unit forward for cleaning and service.
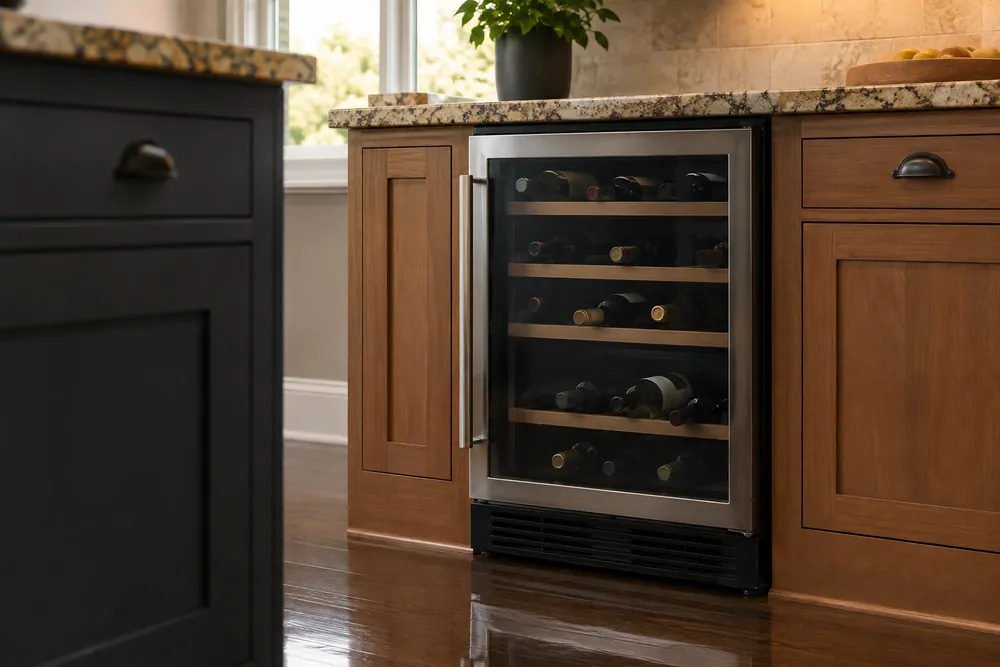
How to Place and Level a Wine Cooler for Quieter Operation
A stable, level installation reduces the path that compressor or fan vibration takes through the cabinet, floor, and nearby furniture.
Correct placement also preserves airflow, helping the cooling system run with fewer prolonged cycles and less noticeable mechanical noise.
Choose a stable location with enough clearance
Place the cooler on a solid, rigid floor that does not flex under its weight. Avoid soft flooring, loose mats, or cabinet panels that can act like soundboards and amplify a low hum.
| Installation detail | Typical category range | Noise-related trade-off |
| Freestanding clearance | About 1 to 5 inches | Restricted airflow can increase fan noise and compressor runtime. |
| Compact storage capacity | About 12 to 30 bottles | Smaller cabinets may still sound louder if placed against a resonant surface. |
| Undercounter opening width | About 15 to 24 inches | A tight or mismatched opening can transfer vibration and trap heat. |
| Typical storage temperature | About 40°F to 65°F | Lower settings can make the cooling system cycle more often. |
Follow the installation manual rather than treating these ranges as universal requirements.
Freestanding, built-in, compressor, and thermoelectric designs can use different ventilation paths, so clearance may be required at the rear, sides, top, or front.
Level the cabinet from side to side
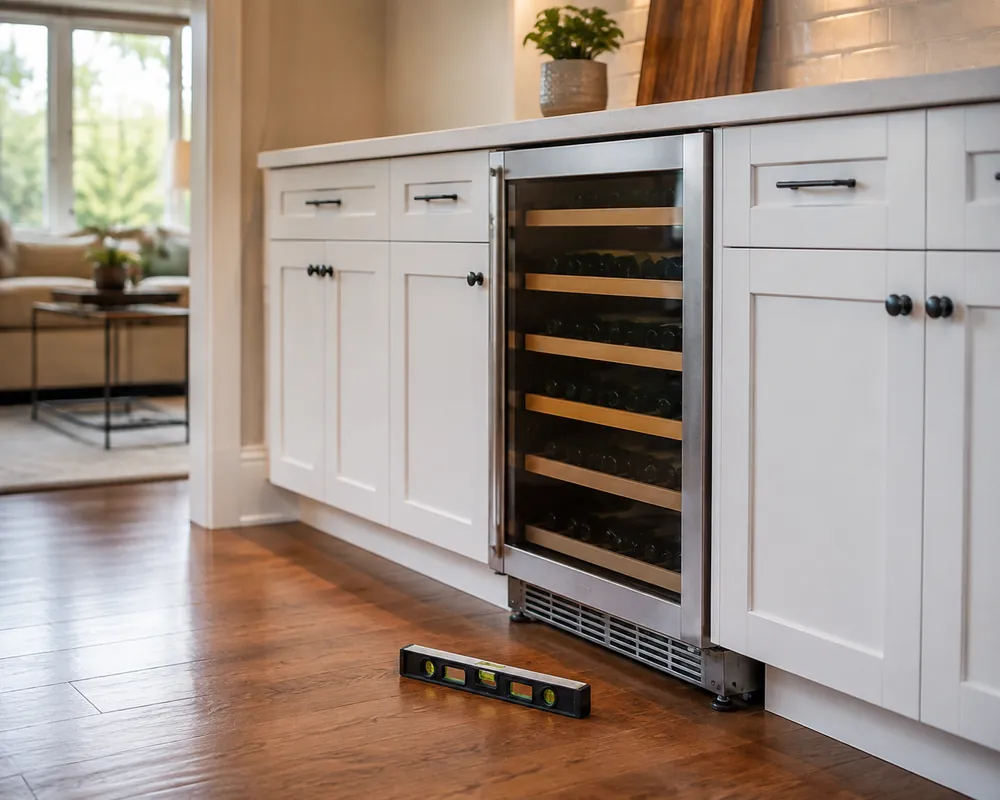
Check the floor and cabinet with a spirit level placed across the front edge, then check it from front to back. Adjust the threaded feet gradually until the cabinet sits firmly without rocking.
A slightly uneven cabinet can let vibration travel through one foot more strongly than the others.
It can also cause bottles, shelves, and door hardware to settle against one side, creating intermittent rattles during startup or cycling.
- Remove or secure bottles before adjusting the feet.
- Turn each leveling foot in small increments instead of forcing one corner upward.
- Confirm that all feet remain in firm contact with the floor.
- Recheck the level after loading the shelves and closing the door.
Prevent contact with surrounding surfaces
Leave the recommended gap around the cabinet and make sure the rear panel, sides, and top do not touch walls, counters, trim, or neighboring appliances. Even light contact can convert a normal hum into a louder resonance.
After installation, listen during startup and steady cooling.
A low hum or gentle fan sound may be normal, but persistent grinding, sharp buzzing, or a rattle that remains after bottles and shelves are secured deserves inspection rather than further leveling.
Features That Usually Make a Wine Cooler Quieter
Quieter wine coolers combine stable cooling, controlled airflow, and cabinet details that prevent vibration from spreading.
The best design depends on where the unit sits, how often it cycles, and whether the sound comes from a compressor, fan, shelf, bottle, or surrounding surface.
Cooling design and operating range
Compressor models commonly produce a low hum, a short startup click, and occasional changes in pitch as they reach the selected temperature.
Thermoelectric models avoid compressor vibration but still rely on fans, so restricted vents, dust, and aging bearings can create a persistent whir.
| Specification | Common range | Noise trade-off |
|---|---|---|
| Storage temperature | About 40°F to 65°F | Lower settings can increase cooling cycles and operating time. |
| Compact to medium capacity | About 12 to 50 bottles | Larger cabinets may need stronger airflow or a larger compressor. |
| Freestanding clearance | About 1 to 5 inches | Insufficient space can raise heat, fan speed, and compressor runtime. |
Cabinet construction and vibration control
Rigid panels, insulated walls, and properly supported compressor mounts help contain normal movement.
Adjustable leveling feet matter just as much because a tilted cabinet can transfer vibration through the frame, floor, counter, or adjacent cabinetry.
Door construction also affects perceived sound. A well-sealed door reduces heat gain, while a firm hinge and compressed gasket help prevent rattling as the compressor starts or stops.
Features that reduce secondary rattles
- Stable shelving: Shelves with secure tracks or cushioned supports reduce chatter when the cooling system cycles.
- Bottle separation: Spaced racks prevent glass from touching glass, side panels, or the rear wall.
- Accessible vents: Front, rear, or side ventilation should match the installation location and remain free of dust.
- Soft contact points: Rubber feet and shelf liners can limit vibration moving into hard floors and cabinetry.
Owner reports can reveal whether a hum is acceptable in a living room, bedroom, or office.
Compare comments about buzzing, rattling, fan pitch, cycling frequency, and installation conditions rather than treating every noise complaint as proof of a defective unit.
Door construction also affects how sound travels.
A well-sealed glass door can reduce air leakage and prevent the unit from working harder, while a loose handle, uneven gasket, or rattling trim may create noise that sounds like a cooling problem.
Measure the full opening, not only the cabinet width. Include hinge movement, handle projection, and the space needed to open the door without striking a wall, island, refrigerator, or nearby cabinet.
A cramped door can transfer vibration through surrounding surfaces.
Check the manufacturer’s required clearance on every ventilated side before choosing a location.
A cabinet that technically fits may still run louder if its rear, front, or side vents sit too close to a wall or another heat-producing appliance.
Use the tape measure to compare the cooler’s depth with the counter edge and wall behind it.
If the cabinet will sit partly under a counter, confirm that the door can swing freely and that the unit will not be wedged tightly into the opening.
Floor conditions matter as much as cabinet design. Tile grout, bowed flooring, thick rugs, and uneven transitions can keep leveling feet from making firm contact.
Measure the space, then inspect whether all feet can rest on a stable, hard surface.
In a kitchen, sound may travel through cabinets more easily than through open air.
Leave enough separation from a toe-kick, side panel, or pantry wall to avoid creating a contact point where normal compressor or fan movement can become a noticeable rattle.
Capacity should match the way the cooler will be used.
An overfilled cabinet can restrict internal airflow and make the fan operate more often, while a mostly empty unit may still cycle normally but provide less benefit if it occupies a prime location.
Listen during more than one operating phase when comparing locations.
A steady hum, brief click, airflow sound, or occasional pitch change may be normal, but a repeated buzz that changes when you touch a panel suggests contact or loose hardware.
Before installation, identify nearby surfaces that could amplify sound, including hollow cabinet sides, countertops, and metal shelving.
A thin isolation pad may help in some setups, but it should not block vents, destabilize the cabinet, or replace proper leveling.
The quietest practical choice is usually the model and location that fit without forced clearance, contact, or awkward door movement.
Measure the opening, ventilation space, floor footprint, and swing path first; then compare cooling type and construction details against the room.
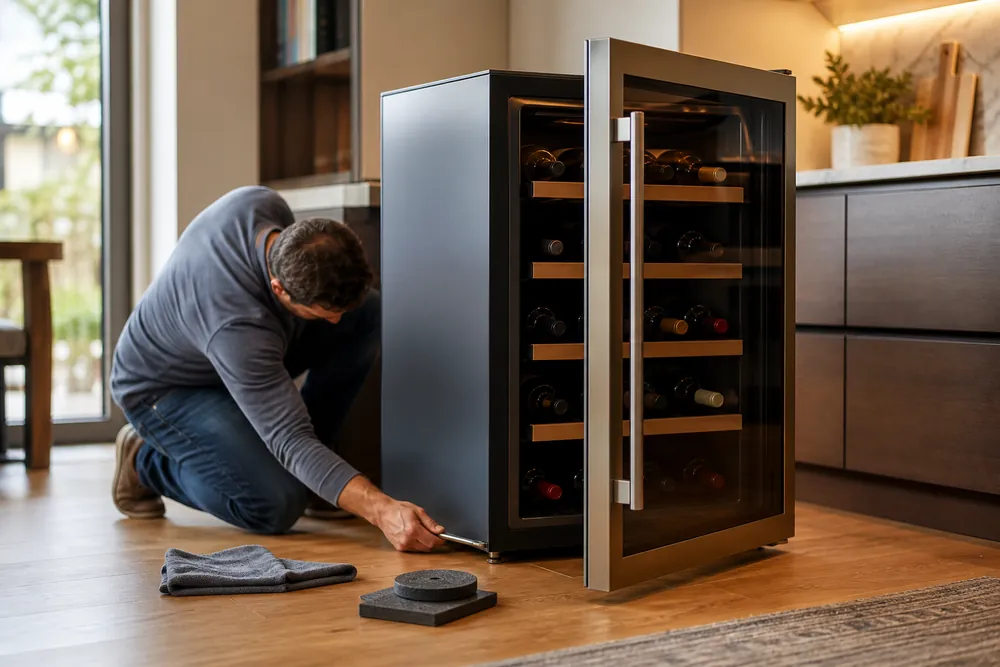
Maintenance Steps That Reduce Rattles, Hums, and Buzzing
Routine maintenance can turn a normal low hum into a quieter operating sound by removing dust, loose contact points, and unnecessary cabinet vibration.
Start with the installation, then inspect shelves, bottles, vents, and cooling components in that order.
Stabilize the Cabinet and Its Surroundings
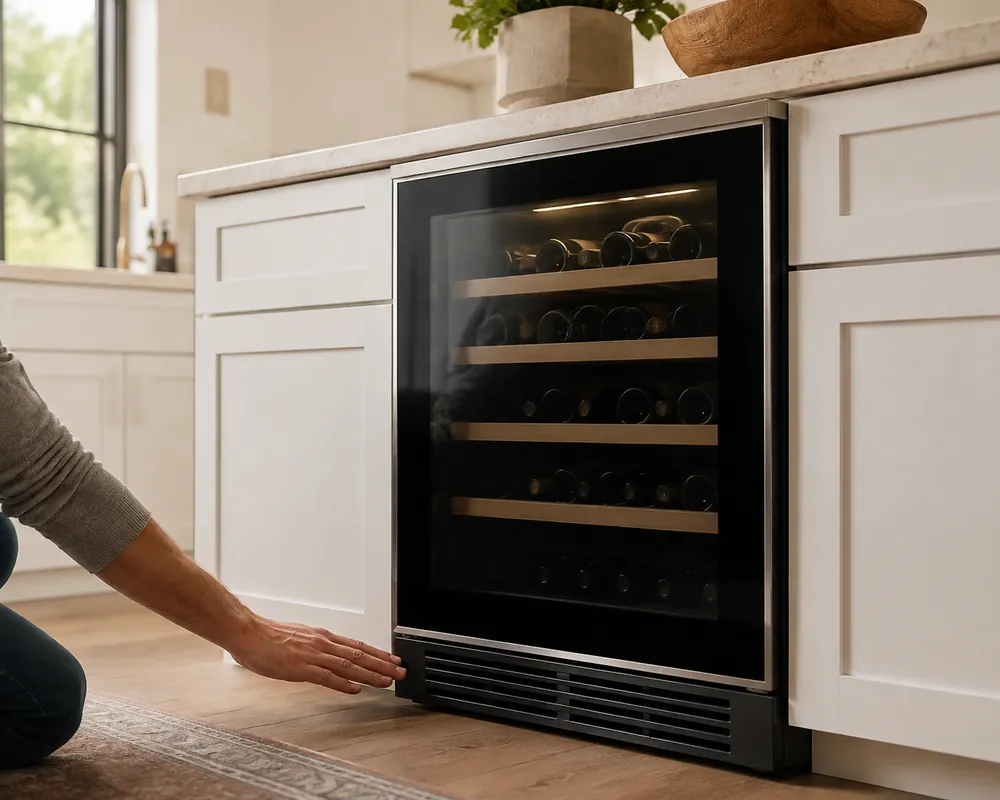
Check that every leveling foot rests firmly on the floor and that the cabinet does not rock when you press opposite corners.
A tilted wine cooler can transmit compressor motion through the frame, while an unstable floor can amplify an otherwise normal hum.
Keep the cooler clear of walls, counters, and adjacent cabinets unless the installation instructions specifically allow contact.
Use the appliance manual as the final authority, because ventilation requirements vary by cooling design and whether the unit is freestanding or built in.
| Installation detail | Common category range | Why it affects noise |
| Freestanding rear or side clearance | About 1 to 5 inches | Restricted airflow can increase fan speed and compressor run time. |
| Compact wine cooler capacity | About 12 to 24 bottles | Smaller cabinets may use compact fans with noticeable airflow noise. |
| Larger home wine cooler capacity | About 25 to 50 bottles | More storage can require stronger airflow or a larger compressor. |
Remove Common Sources of Rattling
Inspect each shelf for a loose frame, missing support, or contact with the cabinet wall. Refit shelves so they sit fully on their rails, and avoid forcing a shelf against bottles or the door liner.
Arrange bottles with small gaps between glass surfaces, especially near the rear wall and side panels.
A soft, nonabrasive liner can reduce shelf chatter when the manufacturer permits it, but do not cover ventilation openings or create an unstable bottle base.
- Remove loose racks, decorative items, and packaging material from inside the cabinet.
- Check that the door gasket seals evenly without rubbing against the frame.
- Look for screws, panels, or trim that buzz only during compressor startup.
Clean Fans, Vents, and the Condenser Area
Unplug the cooler before cleaning exterior vents or accessible fan areas. Dust restricts airflow and can make a fan whir, tick, or buzz as it works harder to move heat.
Vacuum dust gently from the intake and exhaust areas without bending fins or pushing debris deeper into the cabinet.
Never remove sealed-system covers or attempt refrigerant repairs; persistent grinding, scraping, or electrical buzzing requires qualified service.
Track the Sound Before Servicing
Note whether the noise occurs during startup, steady cooling, defrosting, or fan operation.
A brief click or low cycling hum may be normal, while a new rattle that changes when the cabinet is lightly stabilized points toward contact or mounting trouble.
What Owners Wish They Had Checked First
Owner reports repeatedly identify installation and cabinet contact as the first things buyers wish they had checked.
Manufacturer documentation supports that pattern: a normal compressor hum or fan sound can become a louder rattle when ventilation, leveling, shelving, or bottle placement is overlooked.
The recurring complaint is not always a defective cooling system.
Owners often describe a low hum that becomes objectionable after the cooler is pushed against a wall, fitted tightly beneath a counter, or placed on flooring that transfers vibration into nearby furniture.
Clearance and cabinet fit matter more than expected
Freestanding units need room to release heat, while built-in models require the ventilation arrangement specified by the manufacturer.
A restricted vent can keep the cooling system running longer, which makes ordinary compressor and fan sounds more noticeable.
| Check | Common category range | Why owners notice it |
| Freestanding clearance | About 1–5 inches | Insufficient space can increase heat and fan activity. |
| Compact capacity | About 12–20 bottles | Smaller cabinets may transmit fan or compressor sound more directly. |
| Undercounter opening width | About 15–24 inches | A tight or mismatched opening can amplify cabinet vibration. |
Buyers should compare the installation diagram with the actual opening, including trim, hinges, and rear ventilation.
Manufacturer instructions may distinguish between freestanding and built-in use, and that distinction can matter more than a short published noise description.
Leveling and contact points are frequent failure points
Owner reports commonly say that adjusting the feet reduced rattling without changing the cooling system. An uneven cabinet can load one corner, let shelves chatter, and transfer compressor movement through the floor or counter.
- Check that all feet sit firmly on a stable surface.
- Keep the cabinet from touching adjacent panels, walls, or countertops unless the installation instructions allow that contact.
- Inspect shelves, racks, and door bins for movement after loading bottles.
- Leave space between bottles so glass does not strike during compressor startup.
What tends to hold up, and what fails early
Manufacturers generally describe compressors as producing a repeating hum, with brief starting or stopping clicks considered normal.
Owners are more concerned by new grinding, sharp buzzing, persistent rattling, or a fan sound that changes after dust accumulates.
Fans and their bearings are often the early trouble points in thermoelectric and compressor designs alike.
Dust on vents, blocked airflow, loose guards, and aging fans can create ticking or whirring before the cooling performance clearly declines.
Before buying, compare the cooling design, ventilation requirements, door construction, shelf stability, and owner comments about bedroom or living-room placement.
The useful question is whether repeated complaints describe a correctable setup issue or a sound that remains after the documented installation requirements are met.
Frequently Asked Questions
Wine cooler noise is usually manageable once the source is identified.
Compressor hum, fan airflow, loose bottles, and cabinet contact require different fixes, while published specifications and owner reports help buyers distinguish normal operation from a placement or installation problem.
Why is my wine cooler making a humming noise?
A low, steady hum usually comes from the compressor or a cooling fan. It may become more noticeable during startup or while the cabinet returns to its selected temperature.
Check whether the sound stops during a normal cooling pause. Persistent buzzing, grinding, or harsh rattling deserves inspection because it can indicate a loose component, worn fan bearing, or contact with nearby cabinetry.
How can I reduce wine cooler vibration?
Place the cooler on a solid, level surface and adjust its feet until the cabinet does not rock. An uneven floor can transfer compressor movement through the frame and amplify an otherwise normal hum.
- Keep the cabinet from touching walls, counters, or side panels.
- Use stable shelving and prevent bottles from contacting one another.
- Follow the ventilation space specified in the installation manual.
How much clearance does a wine cooler need?
Freestanding wine coolers commonly need about 1 to 5 inches of rear or side clearance, but the correct requirement depends on the cooling design and vent location.
Restricted airflow can make fans run longer and increase perceived noise.
| Installation type | Typical range to check | Noise trade-off |
| Freestanding | About 1–5 inches | Too little space traps heat |
| Undercounter | About 15–24 inches opening width | Poor fit can transfer vibration |
Are thermoelectric wine coolers quieter than compressor models?
Thermoelectric systems generally avoid compressor vibration and may suit quiet rooms. They still use fans, so blocked vents, dust, or aging bearings can produce a whirring, ticking, or uneven airflow sound.
Compressor models can provide stronger cooling across broader conditions but usually create a low hum and periodic cycling. Compare the cooling method with owner reports about bedrooms, offices, or living-room placement.
Why do wine bottles rattle inside the cooler?
Bottles can touch rack wires, shelf edges, or neighboring glass as the compressor starts. Leave stable spacing between bottles, check that shelves are fully seated, and avoid loading heavy bottles where a shelf flexes.
Remove loose accessories and inspect the door rack for movement. A soft shelf liner may reduce contact noise only if it does not block airflow or interfere with the manufacturer’s recommended loading pattern.
How often should I clean a noisy wine cooler?
Dust on intake grilles and condenser areas can restrict airflow, making the fan and compressor operate longer. Unplug the appliance before cleaning accessible vents, and follow the manual for condenser access and safe maintenance.
Do not bend fins, spray liquid into electrical parts, or cover ventilation openings. A new noise after cleaning may signal a loose grille or fan obstruction rather than ordinary dust.
What noise level should I look for when buying a wine cooler?
Compare any published noise specification with the cooling design, ventilation requirements, and owner comments. A single rating does not reveal whether cycling, bottle chatter, or cabinet resonance will be noticeable in a quiet room.
| Specification | Common category range | Possible trade-off |
| Storage temperature | About 40°F–65°F | Lower settings can increase cycling |
| Compact capacity | About 12–50 bottles | Larger units may need more airflow |
Should I return a wine cooler that rattles?
First rule out loose bottles, an uneven floor, restricted clearance, and contact with surrounding surfaces.
A brief click or short startup change can be normal, but grinding, repeated metallic rattling, or worsening vibration should not be ignored.
Record the sound, check the installation instructions, and contact the seller or manufacturer if the appliance remains noisy after basic setup corrections.